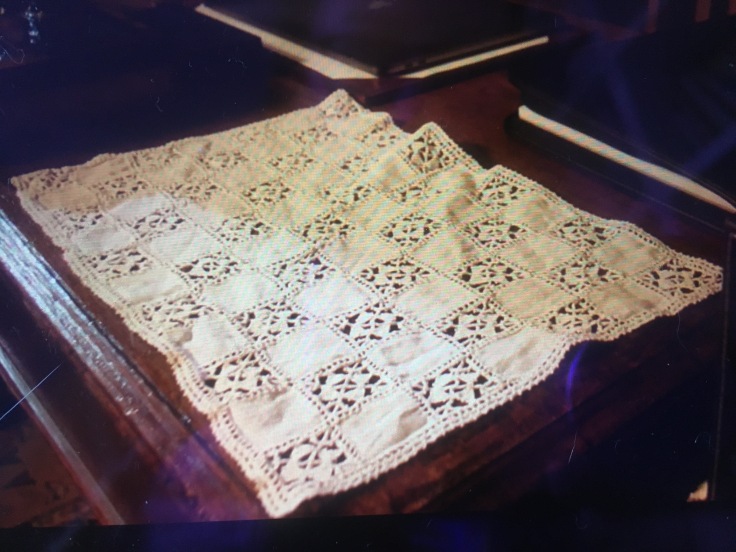
During the winter break, I binged-watched the Agatha Raisin TV series. I’ve loved all the books by M.C. Beaton and was enthusiastic about the series. When watching the episode « the Fairies of Frymfam », a crochet desk mat caught my eye, so much that I pressed pause and took a screenshot. I decided to reconstruct the pattern from this single picture :
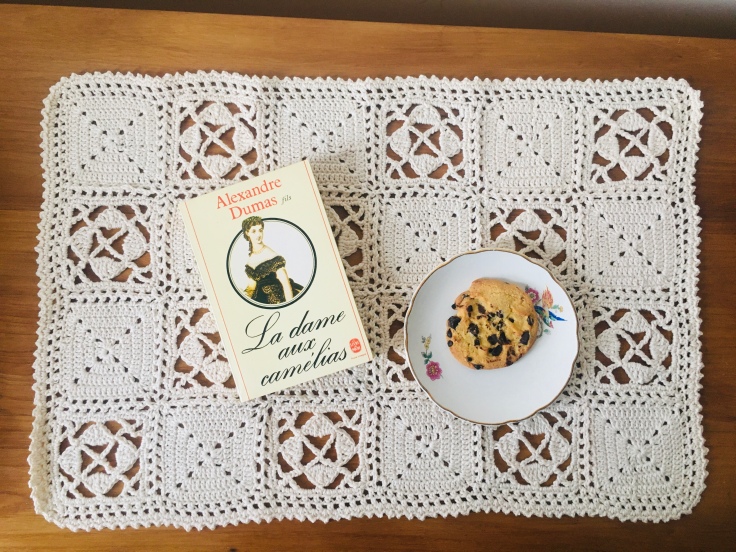
And here it is ! Now you can have your own piece of the Agatha Raisin universe 🙂 (ok, almost.)
Obviously, the original piece is a mix of crochet square and fabric squares (probable a thick cotton or linen blend fabric) My pattern is 100% crochet. Well, life is made of compromise, isn’t it ?
Construction :
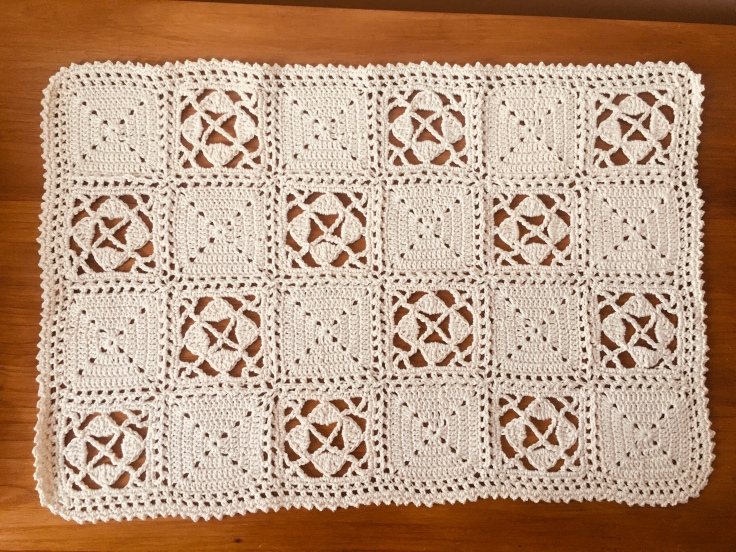
The piece is composed of 24 squares, of 2 sorts (12 of each). You will make all squares first, then join them together by crocheting a HDC mesh in between.
As you may know, there are lots of different methods to join granny squares. Most often you can pick your favorite method, but for this tutorial, I will ask you to follow the pattern in order to achieve the same look as the original piece. Of course you may decide otherwise, and it’s ok, only it will look different.
Once all pieces are joined together, we will add a border all around.
It’s only then that we will wet and block the piece. There is indeed no need to block each square separately. Blocking is recommended for a sleek finished look, but you can decide not to do it.
Stitches required :
This pattern uses US crochet terms and abbreviations.
- Chain (CH)
- Slip stitch (SLST)
- Single crochet (SC)
- Half double crochet (HDC)
- Double crochet (DC) (yarn over once)
- Treble crochet (TR) (yarn over twice)
- Double treble (DTR) (yarn over three times)
- Triple treble (TRTR) (yarn over four times)
Supplies :
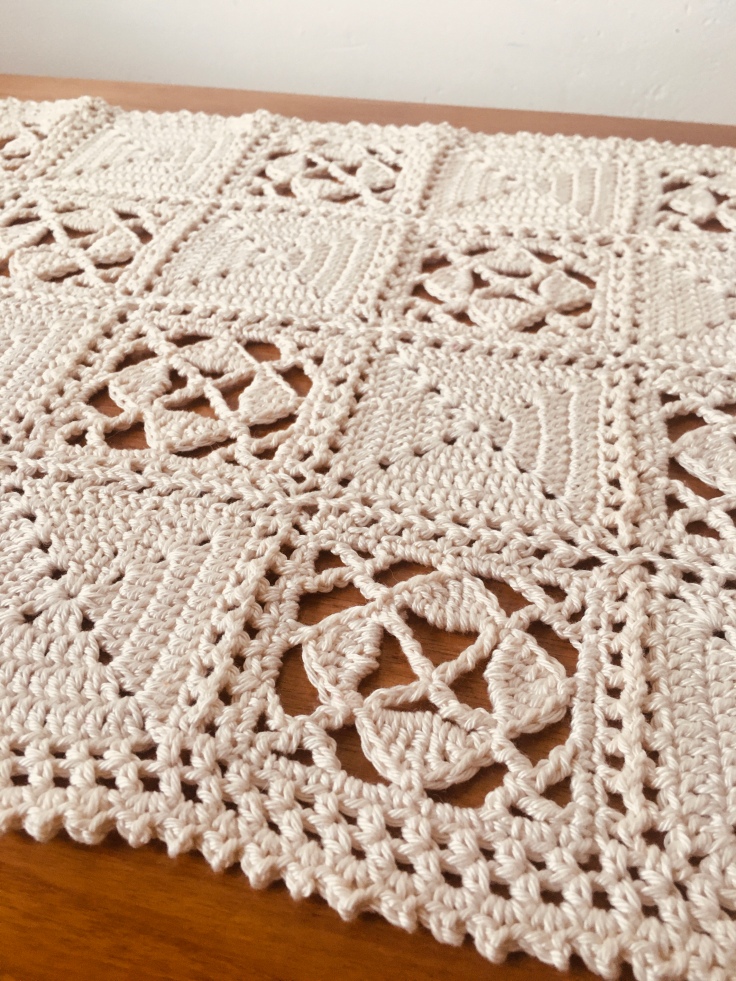
Cotton yarn, 4 ply, usually crocheted with a 3 mm hook (US D) but I will purposedly use a 2,5 mm one (US C).
150 grams for 24 squares as shown on pictures.
I chose cream because the only other choice was bright white and it would have looked too shiny and too « brand new ». The beige color gives it a vintage touch.
Size :
My table mat is made of 24 squares and measures :
- 14″ wide
- 21″ long
Any other size would work, and you can make it a rectangle or a square. The pattern is adaptable.
Gauge :
Each square is 3″
I have 14 DC in 2″
Gauge is not very important unless you want your table mat to be a very specific size.
Keep your tension average (and on the tight side if necessary, but certainly not loose).
Before you start :
This pattern has been proof-read and tested. If however you think there is a mistake, or some instructions are puzzling you, or if my english grammar or vocabulary made you shiver, please message me so I can publish an update (I am French, English is my third language !).
INSTRUCTIONS :
Lacy square :
Don’t turn the work between each round.
Round 1 :
Chain 12.
* Double-treble in the first chain, chain 7 * 3 times.
Slip stitch in the 4th chain.
Round 2 :
Don’t chain.
* In next space make : 1 SC, 1 DC, 1 TR, 1 DTR, 1 TR, 1 DC, 1 SC.
Slip stitch on top of DTR from previous row *
Repeat three more times.
Round 3 :
Chain 11.
Treble crochet in the 4th chain. Chain 3. Treble crochet in the same chain. Chain 3. Single crochet on top of the next treble from previous row.
Chain 3.
* Make 1 triple treble in the next slip stitch.
[Chain 3, treble crochet in the middle of the post of the triple treble you just made] twice.
Chain 3, single crochet on top of the next treble from previous row.
Chain 3 *
Repeat from * to * two more times.
Slip stitch in the 8th stitch from beginning chain.
Round 4 :
Chain 1.
* In next space make 2 SC.
In next treble, make 1 SC, CH1, 1 SC.
In next space make 2 SC.
SC on top of next stitch.
3 SC in next space.
SC on top of next stitch.
3 SC in next space.
SC on top of next stitch *
Repeat 3 more times.
Slip stitch in the first CH1.
Fasten off. Make 12 identical squares.
Plain square :
Don’t turn the work between each round.
« Chain 3 » always counts as a DC.
Chain 4, slip stitch in first chain to form a ring.
Round 1 :
Chain 3, make 2 DC in the ring, chain 2,
* make 3 DC in the ring, chain 2 * 3 times,
slip stitch in the 3rd begininng chain.
Round 2 :
chain 3. DC in next 2 DC.
You’ve reach the corner space : in the corner make : 2 DC, CH2, 2 DC.
* DC in next 3 DC, in the next corner make 2 DC, CH2, 2 DC * : repeat 3 times.
SLST in the 3rd beginning chain.
–> You obtain 7 DC on each side.
Round 3 :
chain 3. DC in next 4 DC.
You’ve reach the corner space : in the corner make : 2 DC, CH2, 2 DC.
* DC in next 7 DC, and in the next corner make 2 DC, CH2, 2 DC * : repeat 3 times.
DC in next 2 DC. SLST in the 3rd beginning chain.
–> You obtain 11 DC on each side.
Round 4 :
chain 3. DC in next 6 DC.
You’ve reach the corner space : in the corner make : 2 DC, CH2, 2 DC.
* DC in next 11 DC, and in the next corner make 2 DC, CH2, 2 DC * : repeat 3 times.
DC in next 4 DC.
SLST in the 3rd beginning chain.
–> You obtain 15 DC on each side.
Fasten off.
Make 12 identical squares.
Joining squares :
I recommend to hide all yarn ends before starting the joining process. It will make it easier.
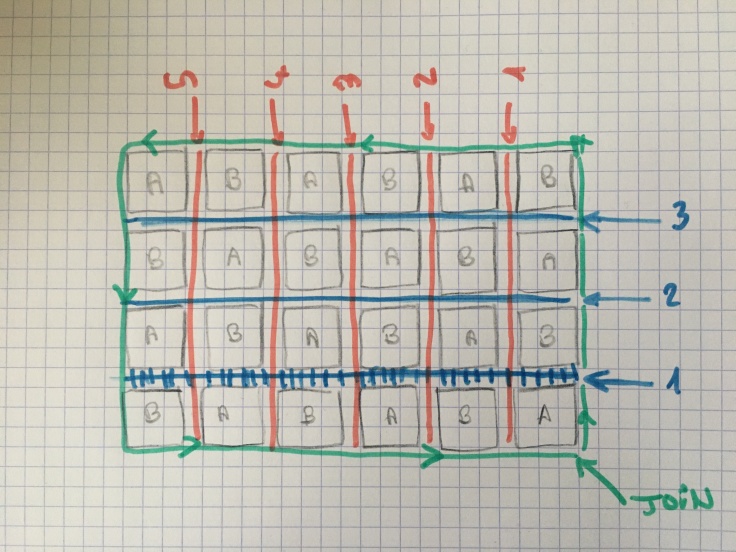
It’s up to you to decide if you start by joining the squares in rows or in lines : it doesn’t change anything for the final result. (follow the blue lines on the sketch, or the red one first).
Arrange your square on a flat surface, alternating type « A » and « B » as shown.
Insert your hook in the corner of the « A » square, draw up a loop, chain 1, and make an HDC in the corner of the « B » square.
Chain 1. Working in « A » : skip 1 stitch, HDC in next. In « B » : skip 1 stitch, HDC in next. Keep working : * HDC in A, HDC in B, chain 1, Skip 1 *. It creates a mesh stitch between the squares.
The last HDCs are made in the corners of the 2 squares, then chain 1, and keep working the same way in two other squares, starting in both corners : DO NOT FORGET to swap square types and keep the right side visible.
Video demo : the mesh join is demonstrated on this Naztazia video (method 4, at 2’09) :
Border :
Follow the green line.
Row 1 :
Join in any corner. Chain 3, HDC in same corner.
Chain 1, skip 1, HDC in next stitch : repeat until you reach the next corner. Chain 1, in the corner space, make : HDC, Chain 2, HDC.
Now repeat « CH1, SK1, HDC »… all around.
When reaching the first corner, chain 1 then slip stitch in the 2nd beginning chain.
Don’t turn.
Row 2 :
Chain 3.
* HDC in next HDC, chain 1 * repeat all around, and slip stitch in the 2nd beginning chain.
(you make 1 HDC on top on every HDC from the previous round).
Don’t turn.
Row 3 :
Row 3 is optional, this table mat is very beautiful once we reach row 2. I still did row 3, in order to stick to the original project, which was to recreate the same as in the movie.
Chain 1.
In each space around, make : 1 SC, CH2, 1 SC. Skip all the HDCs from previous, work only in the gaps.
To end, slip stitch in the chain 1.
Fasten off.
And voilà !
Now you can wash and block your project by using any method that works for you.
Terms of use :
This pattern is free and you can make and sell any item you want. You may not copy any text or pictures from this tutorial, you may not claim it as your own in any way, you may not sell the finished pieces without linking back here. Thank you for being a repectful and well-behaved person !
Please share your creations, I’d love to see pictures.
On Ravelry : https://www.ravelry.com/patterns/library/fairies-of-fryfam-desk-mat
Je le trouve ravissant. J’ai très envie de faire une tentative avec un crochet 1,75 ou 2 et un coton DMC 😊
J’aimeJ’aime
Ce serait superbe, merci pour le message ! Au fait, je vais préparer la traduction du tuto vers le français prochainement.
J’aimeJ’aime